Jul 15
Rob
pdf download:
- INTRODUCTION
Pop to dive bombing achieves two primary aims; first it provides a stable, predictable launch platform for the weapon with ideal parameters. Second, it makes the striker a dynamic target for air defences. Pop attacks are suitable for moderately defended areas (light AAA and MANAD threat). In more extreme threat environments, consider using toss attacks or stand-off weapons.
A 45/30 pop is used for low drag weapons, between the Mk82 and Mk84. It is also suitable for CBU munitions. The ‘45’ refers to the climb angle of 45 degrees, and the ‘30’ refers to the dive angle of 30 degrees.
Pop attacks are high workload so must be practiced to gain proficiency. If they appear hard at first; it is because they are hard. Fighter pilots spend a lot of time practicing these attacks to make them almost second nature. They are not only tactically sound weapons deliveries, but they enhance aircraft flying skill as they build good techniques (some of which are detailed herein). Practicing pops with bad technique is unlikely to see your success improve (success being accurate delivery and release parameters).
Despite the difficulties you may encounter learning these attacks, with deliberate practice over time, accurate pop attacks are achievable and will yield very good results.
- CHECKLIST AND AIRCRAFT SETUP (Mk 80 series/CBU)
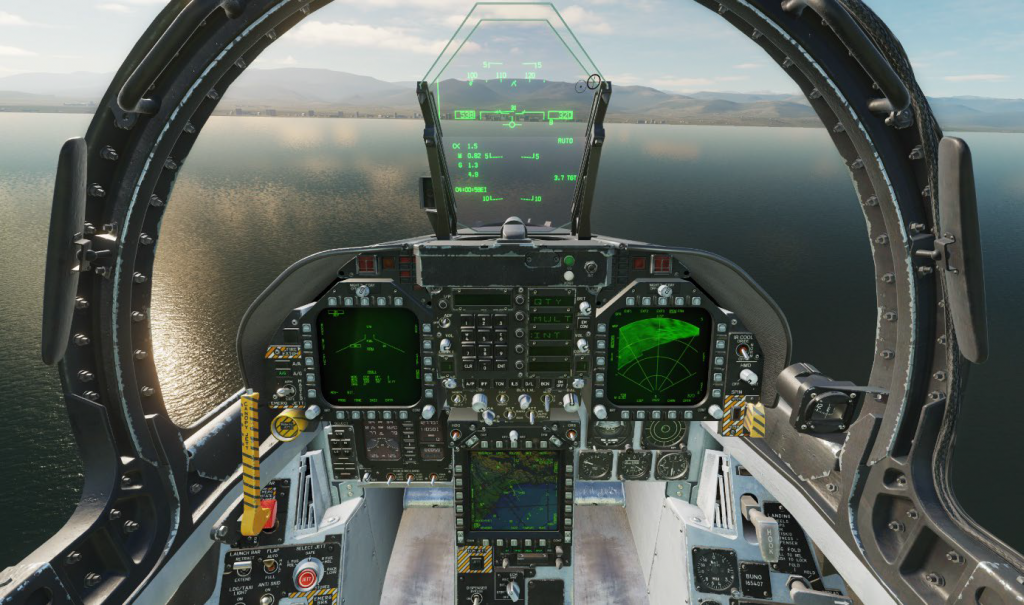
Passing the IP, conduct the Bomb Arm Checks prior to 10nm to run to the target (‘AMPWACD’ nonmonic):- Altimeter – QNH set, HUD to BARO (‘Altimeter’)
- A/G MASTER MODE – SELECT (‘Mode’)
- TGP – Not required (‘Pod’)
- Laser Arm Switch – N/A
- Station – Select (‘Weapon’)
- Mode – CCIP EFUZ – INST
- CODE – N/A
- QTY, MULT, INT – SET as required
- MASTER ARM – ARM (‘Arm’)
- Countermeasures – SET (‘Countermeasures’)
- TGT – DESIGNATE (‘Designate’)
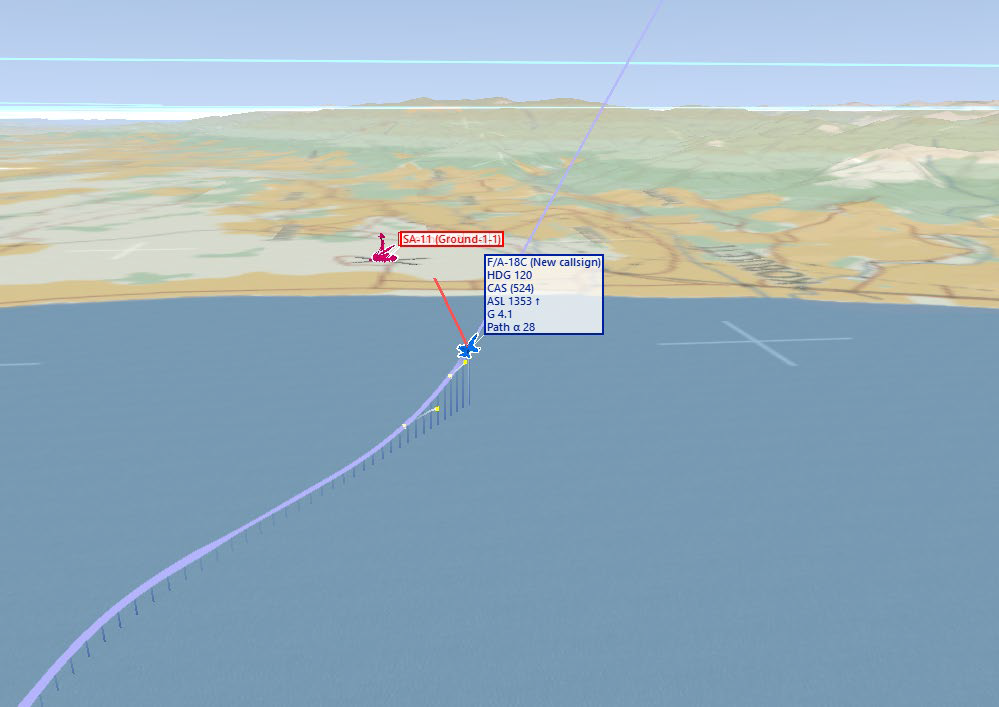
Continue to the run in to the target and refresh the target brief:
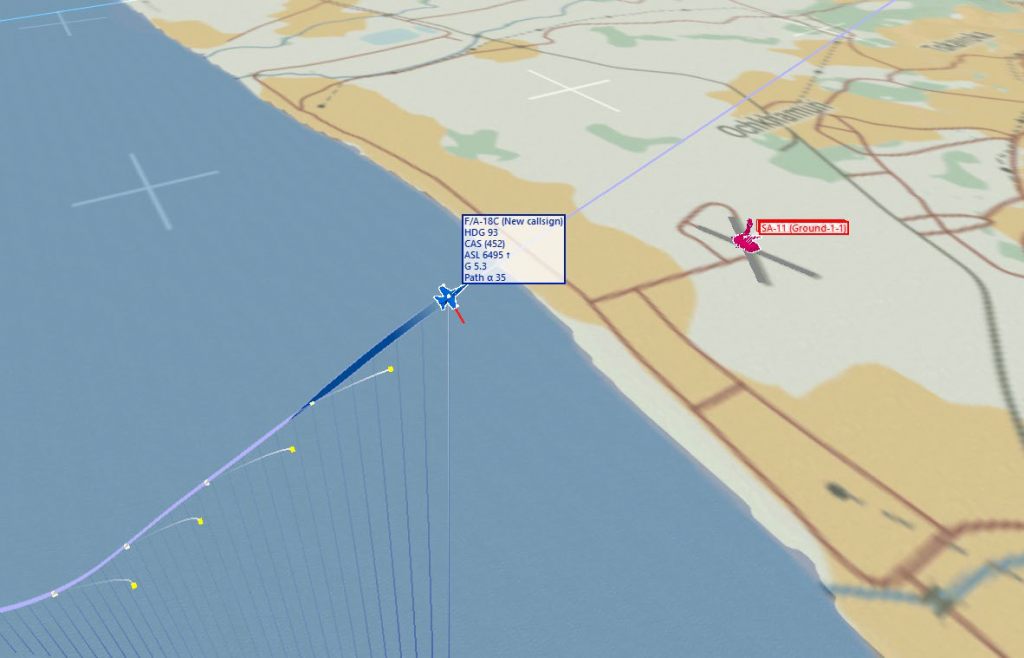
‘Run in heading 085 degrees. Action right at 4.5, pull up at 3.5, roll-in at 4500ft. 30 degree dive, minimum release height 3100ft. Off target right.’
- 45/30 RUN IN, ACTION AND PULL-UP
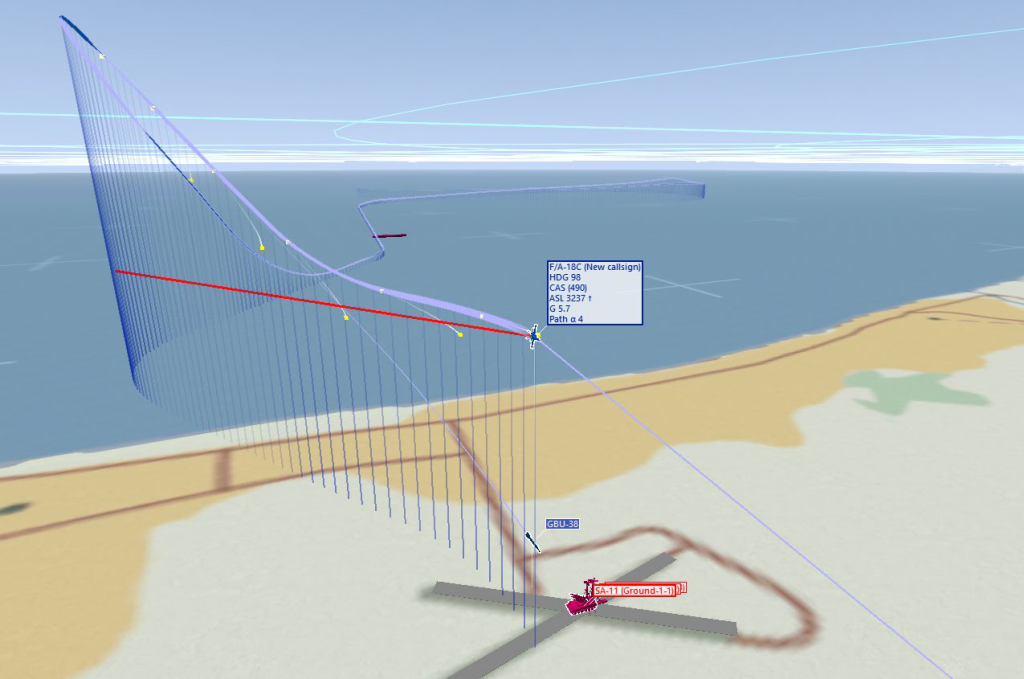
At 10nm to run, confirm attack heading and ensure speed is 540 KCAS (+/- 20). See figure 1.
At 4.5 nm to run, action the desired direction by 30 degrees. Action refers to a 4g level turn through 30 degrees. For example, if running in on heading 085, a right action would be on to heading 115. You should not need to add power as you action as the small turn will only bleed 4 to 5 knots.

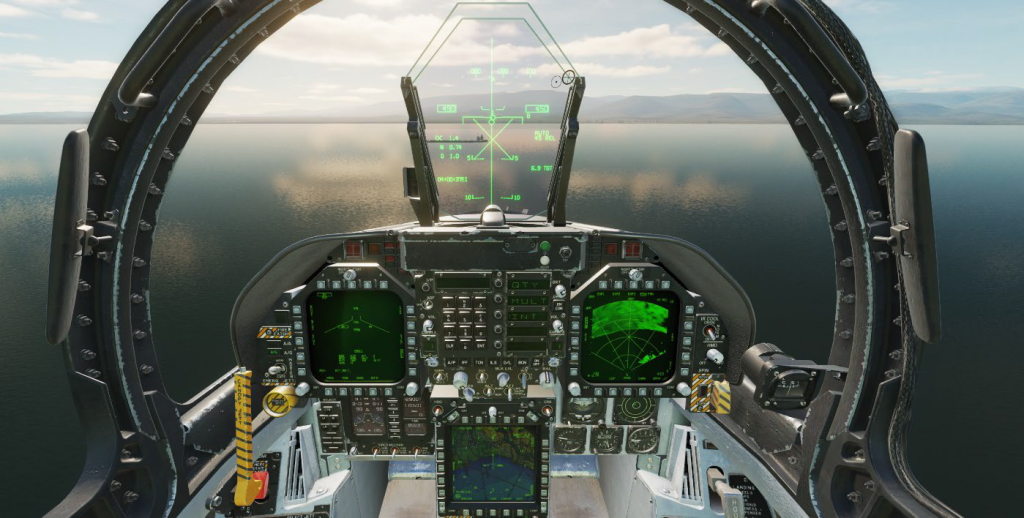
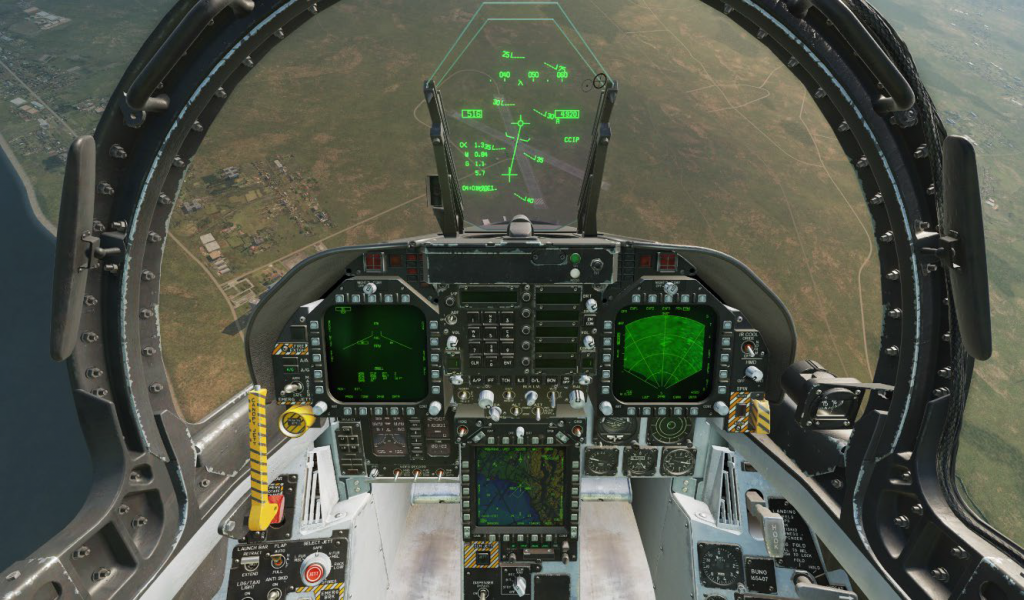
The pull-up comes very quickly after roll-out from the action (~3 seconds). At 3.5 nm to run to the target, simultaneously select MAX A/B, smoothly pull to 4g and activate the countermeasures program. You need to aim achieve 4g within 3 seconds of commencing the pull. Continue the 4g pull until the ‘boxes’ (the ALT and SPEED boxes in the HUD) align with 46 degrees nose up, then stop the pitching up at this attitude. The Velocity Vector (VV) will settle very close to 45 degrees (maybe half a degree below, which is adequate).
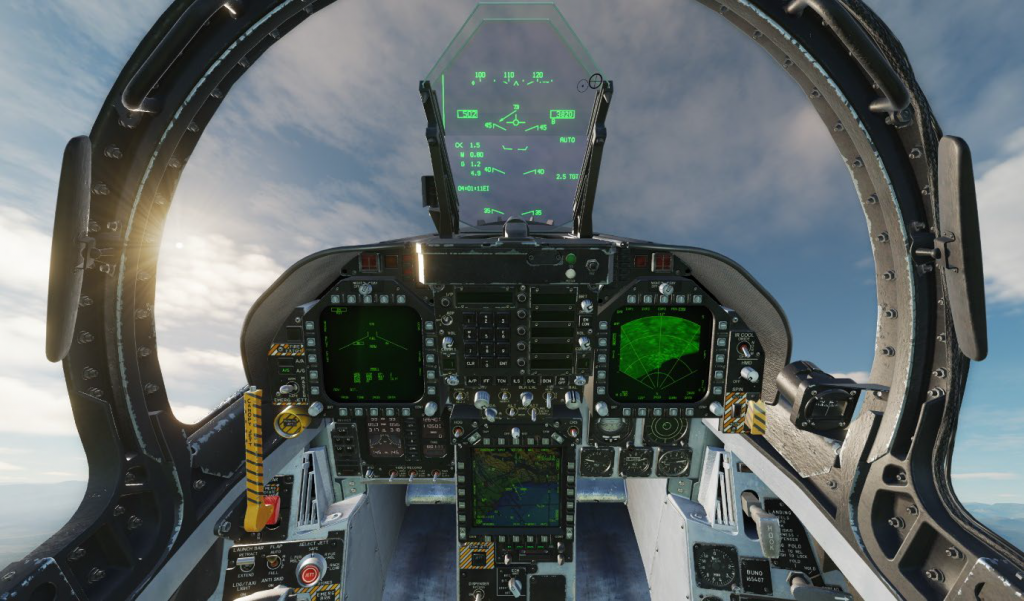
EXPLAINER: The boxes/middle of the boxes = where the nose of the jet is pointing!
The ALT and SPEED HUD boxes are positioned vertically to align with the nose of the aircraft. The unmarked position halfway between them is the horizontal nose position. You will notice this when the waterline appears in the F/A-18 HUD during take-off/landing, as the waterline is directly in between the boxes. In this way, the point in the HUD directly between the boxes is where the nose is pointing. ‘Middle of the boxes’ means the nose! The VV on the other hand, shows you the aircraft flight path, which is broadly explained as the aircraft nose position minus the angle of attack. When pitching in air to ground attacks, doing so with reference to the boxes allows you to set the nose position, and the VV will end up in a predicable position after the manoeuvring stops. The pull-up in a pop is the classic example: assuming you enter the pull at the correct speed and with the correct g, if you stop the pull with the boxes at 46 degrees nose up, you will find the VV settles at ~45 degrees nose up as the alpha reduces when you release the back stick.
If desired, scan toward the target area (over left LEX for a right action, vice versa) and identify the target. There is very little time for this scan as the roll in height happens quite quickly; if your parameters are spot on, you only have 2 seconds between completing the pull-up to passing the Start-Roll Altitude (SRA). You must be back looking through the HUD prior to passing the SRA.
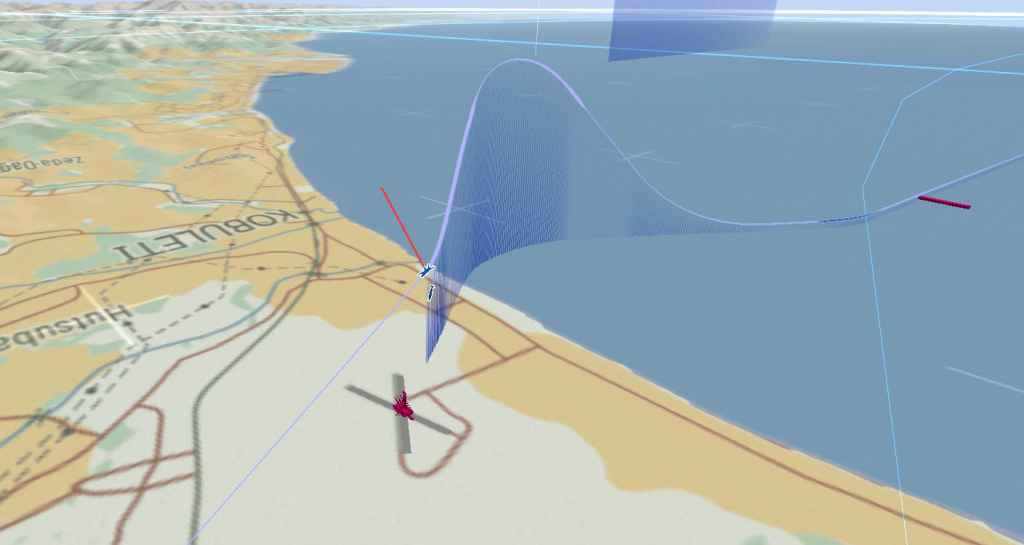
- START ROLL ALTITUDE (SRA) AND ROLL-IN
The vertical speed in the climb following the pull-up will be very high; in the order of 550 feet per second (~34000 fpm). Even if you begin to roll-in as soon as you recognise passing the SRA, your altitude will be at least 1100ft above the SRA before you even commence the pull down, and you can expect to gain around another 900ft in the pull until the climb stops. Delaying the roll-in past the SRA will cause significant errors in the pop geometry, which will appear as excessive dive angles. Do not delay past SRA.
The SRA for a 45/30 pop is the target altitude + 4500ft.
As you pass the SRA, roll the aircraft toward the target such that the target is almost directly ‘above’ you (i.e. bank such that you can now pull straight to the target aim-off point, defined below). The required bank angle will be in the vicinity of 150 degrees – overbanked. Once the bank angle is set, smoothly pull with 5-6g toward the target.
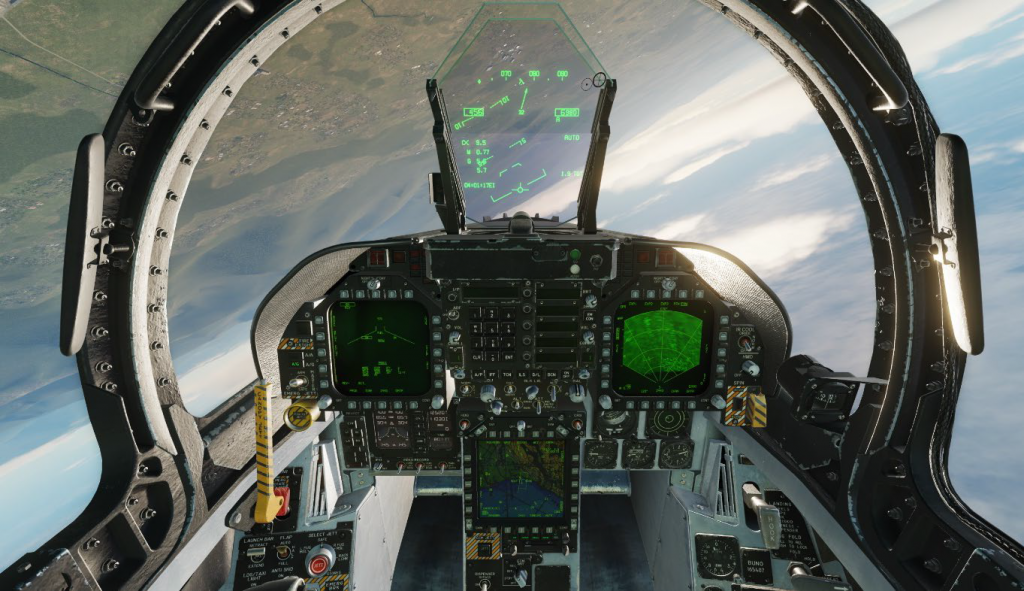
If you start the roll in within a second or two of passing the roll in altitude, you should peak at approximately target altitude + ~7000ft.
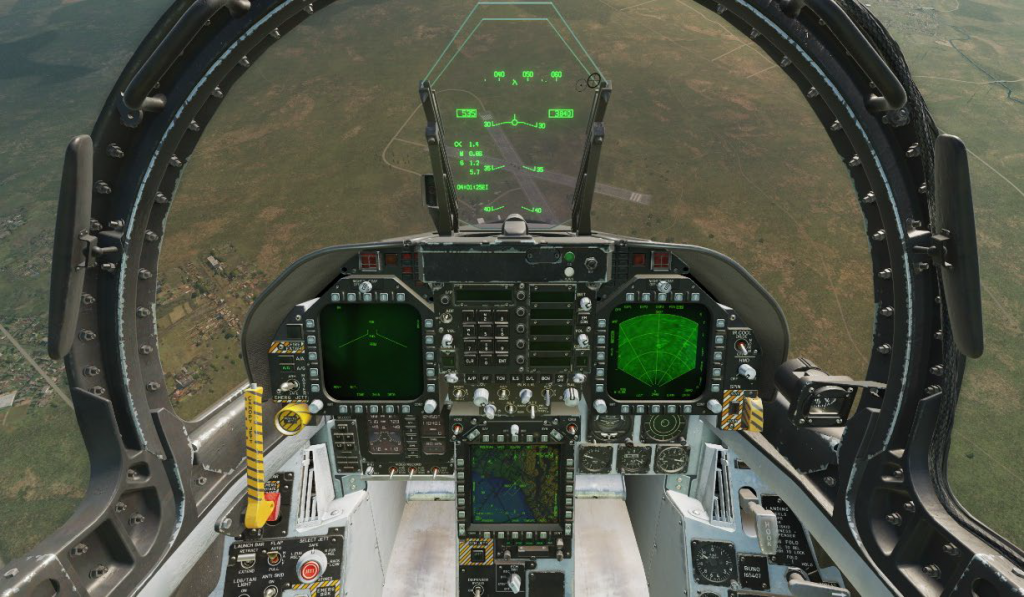
Continue the pull down to place the nose (middle of the boxes) ~4 degrees directly above the target, then roll out. The point just below the nose, where the VV will settle, which is long of the target is called the aim-off point (AOP). At roll-out, the AOP is ~3 degrees LONG of the target and if you have got the manoeuvre right up until this point, the AOP will be at 30 degrees nose down. Obviously, this means the target, at roll-out, should be in the vicinity of 34 degrees nose down.
When rolling out DO NOT PUT THE VV ON THE TARGET. Remember: the VV will settle 1 degree below the boxes in a stable dive so anticipate this when rolling out to make sure
- ROLL-OUT, AIM-OFF POINT (AOP) AND DIVE
The correct technique to achieve a good roll out is to stop pitching with the nose (‘middle of the boxes’) ~1 degree of HUD pitch above the aim-off point, prior to rolling out. This requires anticipation to stop pitching as the nose (middle of the boxes) arrives just above your aim-off point, then rolling without any back (or forward) stick input. This is called an ‘unloaded roll’ and will ensure the aircraft ‘rolls around the nose’ without turning further.
If you attempt to use the velocity vector to roll out on the AOP, you will inevitably pull through the target and require a significant correction to realign yourself after roll out. This is because the velocity vector reflects the alpha on the jet in the pull down; which will be somewhere close to 10 degrees. A common error is pulling the VV on to the target from the roll in, instead of the ‘middle of the boxes’; this causes the nose to overshoot the target by around 5 to 8 degrees. This is not an insignificant error which then has to be corrected in the dive, greatly increasing workload and reducing the chances of an accurate pass!
As you roll out with the boxes on the AOP, you must also reduce the throttle to 50% travel (‘stand it up’). This will ensure you deliver the weapon at an appropriate speed. Deliveries in excess of 600 KCAS risk the weapon failing to detonate. The desired release speed window is 500KCAS to 580KCAS (ideal is 540KCAS).
The absolute maximum safe dive angle is 40 degrees. Above this and your chances of pulling out of the dive are greatly reduced. If you require a dive angle greater than 35 degrees, you should abort the pass.
On roll out, the ASL should be through the target with the Target Designation diamond on the target. Once you have identified the target, hit the UNDES (UNDESIGNATE) HOTAS button the leave AUTO mode and go back in to CCIP. You may do this during the roll out if you get an early target ID (Note that you can perform a pop using AUTO mode if you wish, and this method is described later in this document).
- WEAPON RELEASE AND RECOVERY
Continue in the dive with a steady attitude of ~30 degrees as the CCIP cross tracks up the HUD toward the target. Use small bank on, bank off corrections to keep the bomb fall line tracking over the target. As the CCIP cross moves over the target, ensure the wings are level and press the pickle button to release your weapon.
Minimum Safe Release Height (MSRH) for a Mk82 is 3100ft above target altitude. MSRH for a Mk 84 or CBU is 3300ft above target altitude.
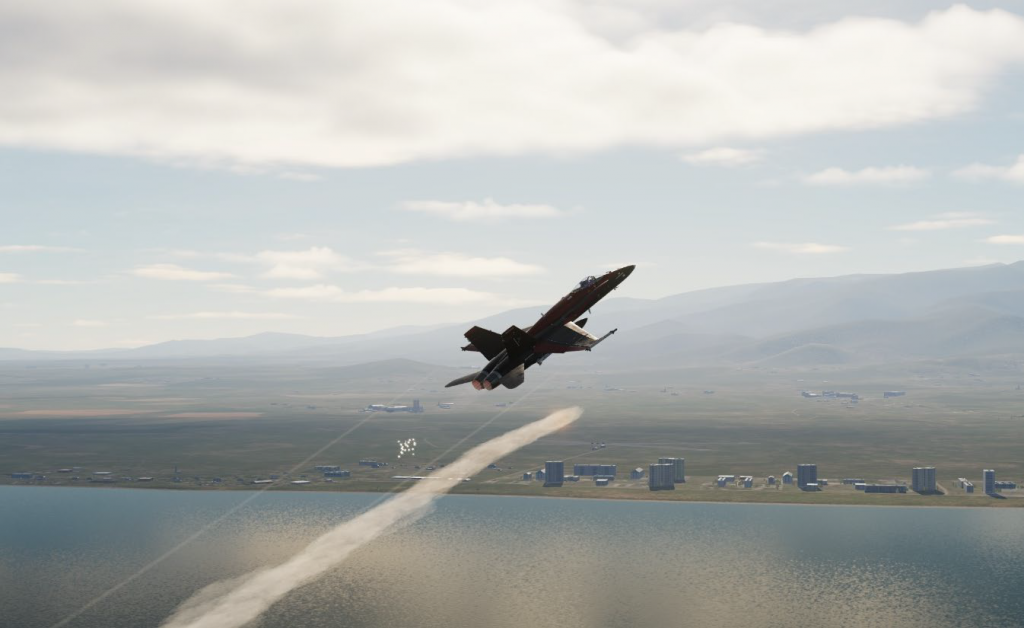
Once the weapon has cleared the aircraft, immediately commence a >4g pull up to the horizon. A turning escape manoeuvre can then be flown by rolling the same direction as the pop action and pulling with >5g to the initial action roll-out heading. This will clear you from the target area and keep your tracking hard to predict for air defences. It is advisable to initiate another countermeasures program at this point also, to assist with your egress. When you are ready, positively resume low level flight.
- AUTO DELIVERY
To conduct an AUTO delivery, ensure the TDC is assigned to the HUD (dot in VV) and simply leave the bomb in AUTO mode on roll out. Slew the TDC to the target as required in the dive, then commence the pull up the ASL with 3g no later than 4500ft above target altitude. Remember to press and hold the pickle button as you commence the pull to authorise weapons release as the release cue passes the VV.
As the time in the dive for a pop is limited, AUTO deliveries will be a challenge if the TDC requires slewing. However, if you commence the attack with a good designation, these attacks can allow for a shorter dive; which is less time for the enemy to take shots at you.
- JDAM DELIVERY
It is possible to deliver a JDAM via a pop. In some cases, this may be the only way to get close enough to a target to employ the weapon.
Set-up the weapon in TOO or PP as desired. The pop is the same as for an AUTO delivery, except once you are presented the ‘IN ZONE’ cue in the dive, press the pickle and commence a pull out. The weapon will guide itself from there and you are then able to rapidly egress the target.
- COUNTERMEASURE SETUP
Ensure when conducting pop deliveries that you have your countermeasures set to run an adequate program during the attack. If set up correctly with a sufficient length program, you may only need one dispense authorisation at the start of the pull-up.